Have you ever admired the sleek elegance of knotless braids and wondered how to achieve this flawless style on your own?
Knotless braids have taken the beauty world by storm, celebrated for their natural appearance and gentler approach on the scalp compared to traditional braids. By eliminating the knot at the root, knotless braiding offers a more comfortable experience and less tension.
Whether you’re an experienced braider or trying your hand at styling for the first time, this guide will walk you through the steps to create perfect knotless braids. With a little patience and practice, you’ll develop the skills needed to transform your look with this trending hairstyle.
Understanding Knotless Braids
Before diving into the styling process, it’s essential to understand what sets knotless braids apart from traditional box braids. The distinction lies in the installation technique.
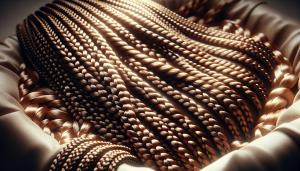
Unlike box braids, which start with a knot at the base, knotless braids are achieved by gradually feeding in hair extensions, creating a seamless look starting at the scalp. This method not only offers a more natural look but also reduces the risk of tension and breakage, making them a popular choice for many.
Benefits of Knotless Braids
Knotless braids offer numerous advantages beyond their chic appearance. Here are a few reasons why they might be the right choice for you:
- Less Tension on the Scalp: Without the knot, your scalp experiences less pulling and stress, reducing the risk of headaches and hair loss.
- Natural Look: Knotless braids offer a more seamless integration with your natural hair, providing a look that is often described as more natural and smooth.
- Versatility: They are incredibly versatile, offering endless styles, from long and straight to intricate updos and curly ends.
- Longevity: When maintained properly, knotless braids can last four to six weeks, offering a long-term styling solution that’s worth the effort.
Are Knotless Braids Right for You?
It’s essential to consider your hair texture and styling goals when deciding if knotless braids are suitable for you. This style works well on various hair types, but things like your hair’s density and any scalp sensitivity should be factored in. Consulting with a professional stylist can offer more personalized advice, ensuring that knotless braids are tailored to your hair’s needs.
Preparing for Knotless Braids
Successful knotless braids begin with thorough preparation. Taking the time to ready your hair and gather the necessary tools can make the actual braiding process smoother and more efficient.
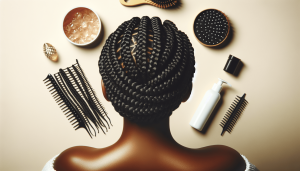
Essential Tools and Materials
Here’s a checklist of the tools and materials you’ll need for creating knotless braids:
- Combs: Use a rat-tail comb for parting and a wide-tooth comb for detangling.
- Braiding Hair: Select high-quality synthetic hair extensions that suit your desired style and length.
- Moisturizing Products: Hydration is key, so you’ll need a leave-in conditioner or hair oil to keep your hair nourished.
- Edge Control: For a sleek and polished finish around the hairline.
- Hair Clips or Bands: Use these to section off hair as you work.
- Scissors: For trimming excess braiding hair.
- Heat Protection Spray: If you plan to seal the ends with heat.
Preparing Your Hair
Proper preparation of your natural hair will enhance the overall look and longevity of your braids. Here’s a step-by-step guide to preparing your hair:
- Cleanse: Begin with washing your hair using a sulfate-free shampoo to prevent dryness.
- Condition: Apply a deep conditioner to replenish moisture and improve manageability.
- Detangle: Use a wide-tooth comb to gently detangle your hair. It’s essential to remove knots to prevent tangling during the braiding process.
- Stretch: Depending on your hair type and the final look you want, you may choose to stretch your hair using heat-free methods like banding or twist outs.
- Section: After stretching, section your hair into smaller parts to make it easier to handle.
Choosing the Right Extensions
Selecting the appropriate hair extensions is crucial in achieving the perfect knotless braid. Consider the following factors:
- Color: Match the extensions to your natural hair color for a unified look. However, don’t shy away from experimenting with color for some personality.
- Texture: Choose a texture that closely resembles your hair or compliments it for a more natural appearance.
- Length and Volume: Decide on the length and volume you want, keeping in mind that longer and fuller braids will require more packs of extensions.
Braiding Step-by-Step
With your hair prepared and materials ready, you’re set to start braiding. Follow these steps to create stunning knotless braids:
Step 1: Section Your Hair
Divide your hair into sections using a rat-tail comb. The size of each section will determine the thickness of your braids. For uniformity, ensure the sections are consistent throughout your head.
Step 2: Begin With a Small Braid
Starting at the nape of your neck, take a small section of hair and begin a traditional three-strand braid. Maintain a grip without making it too tight, ensuring you’re gentle on the scalp.
Step 3: Add Extensions Gradually
Once you’ve got a base established with your natural hair, begin adding extensions. Feed in small portions of the extension hair as you braid, integrating them smoothly into your natural strands. This technique is what creates the “knotless” effect. Repeat this process until you reach the ends of your natural hair.
Step 4: Continue Braiding
Continue the process, section by section, until your entire head is covered in knotless braids. Take breaks if needed to protect your back and hands from fatigue.
Step 5: Finish the Ends
Choose a method to seal the ends. Some prefer to dip the braid ends in hot water or use a flat iron. Be cautious and wear protective gloves if you choose the hot water method to avoid burns.
Caring for Your Knotless Braids
Now that your braids are complete, maintaining them properly will ensure they remain fabulous for weeks to come.
Maintenance Tips
- Moisturize Regularly: Apply light oils like argan or jojoba oil to your scalp and braids to prevent dryness.
- Scalp Care: Gently massage your scalp to boost circulation and aid in eliminating build-up.
- Wrap at Night: Use a silk or satin scarf to cover your braids while sleeping. This will reduce frizz and extend the styles’ longevity.
- Regular Cleaning: Clean your scalp every couple of weeks with a gentle, watered-down shampoo applied with an applicator bottle to reduce build-up.
Troubleshooting Common Issues
Despite your best efforts, you might encounter some typical braid-related issues. Here’s a quick table to help address these challenges:
| Problem | Solution |
|---|---|
| Frizzy Braids | Apply a moisturizing spray and wrap with a scarf overnight for smoother results. |
| Tight Braids | SOften by spraying warm water mixed with a little apple cider vinegar. Gently massage your scalp for relief. |
| Dry Scalp | Keep your scalp moisturized with oils and avoid products with excessive alcohol. |
| Loose Extensions | Re-braid only the affected sections, ensuring a secure yet gentle grip on the hair. |
Styling Your Knotless Braids
One of the most delightful aspects about knotless braids is their versatility. You can switch up your look easily without much effort.
Styling Ideas
- Half-Up, Half-Down: Gather the top half of your braids into a bun or ponytail. This style highlights your face and offers a playful yet elegant look.
- High Bun: Sweep all your braids up into a topknot for a clean, sophisticated look perfect for any occasion.
- Braided Crown: Create a crown braid by wrapping two large braids around the head. Secure with bobby pins for a regal appearance.
- Accessorize: Add charms, beads, or colored strings. Accessories can transform your look, adding a personal flair and creativity to your style.
Express Your Style
Regardless of how you choose to style your braids, remember that confidence is the best accessory. Embrace the versatility and creativity that knotless braids afford you.
Final Thoughts on Knotless Braids
Achieving perfect knotless braids requires preparation, patience, and practice. However, the effort is well worth it for a style that offers comfort, versatility, and beauty. With this comprehensive guide, you’re now equipped with the knowledge to tackle this style on your own or provide instructions to your stylist for a salon appointment.
By taking care of your braids and your scalp, you’ll ensure that this chic, convenient style looks good and feels even better throughout its lifespan. Embrace the transformative power of knotless braids, and enjoy the blend of tradition and modernity they bring to your hair journey.